Introduction:
Our integration journey begins with Keap, where tags initiate campaigns. Data seamlessly transfers to Make.com, enhancing reach and engagement. Finally in Airtable, data is strategically placed based on conditions. This automation streamlines processes, optimizing campaign performance and resource utilization.
Keap Tagging:
SeamlessUsers can effortlessly fill out JotForm forms tailored to your organization’s needs, providing essential information for registration.
Seamless Data Transfer:
Effortlessly transfer campaign data from Keap to make.com for enhanced reach and engagement.
Conditional Data Placement:
Ensure strategic data placement in Airtable based on predefined conditions for optimized campaign management.
Resource Optimization:
Maximise resource utilization by automating campaign processes, reducing time and effort.
Platforms:
We at HikeBranding, will use Customer Relationship Management(Keap CRM), Make.com, and Airtable for this automation.
In this workflow, a specific tag is applied to a contact in Keap, triggering automation. The automation checks conditions if they are fulfilled, the campaign proceeds, and data is sent to Make.com. Subsequently, after filtering the data is directed to the appropriate tables in Airtable based on the gold and silver categories.
Steps:
1. Keap Setup
- Login to your Keap account, generate a Tag named: Registration and some custom fields named: Membership, Preferred Contact, and Reg Status.
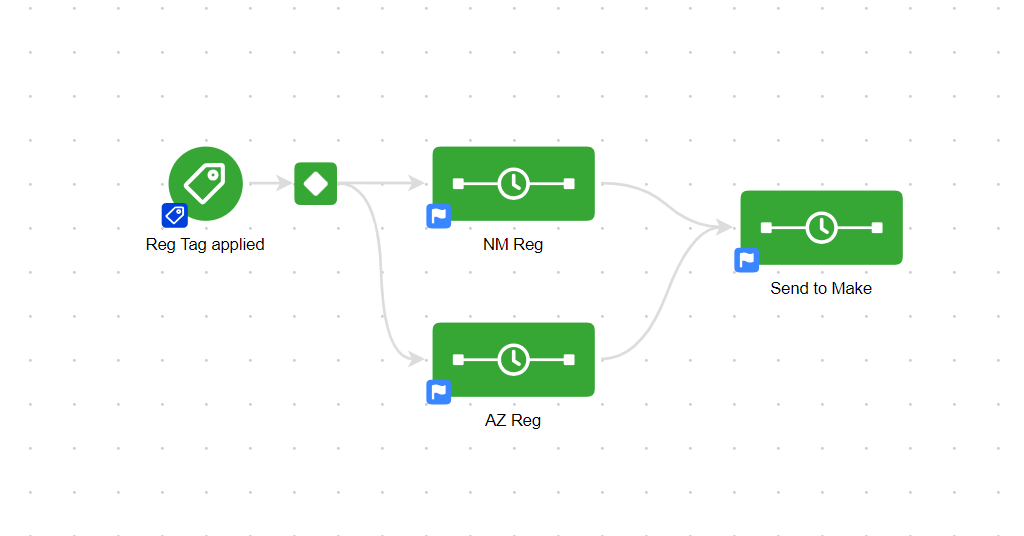
- Create a Campaign: Add an applied tag(Reg Tag) then add two sequences that are based on decision.
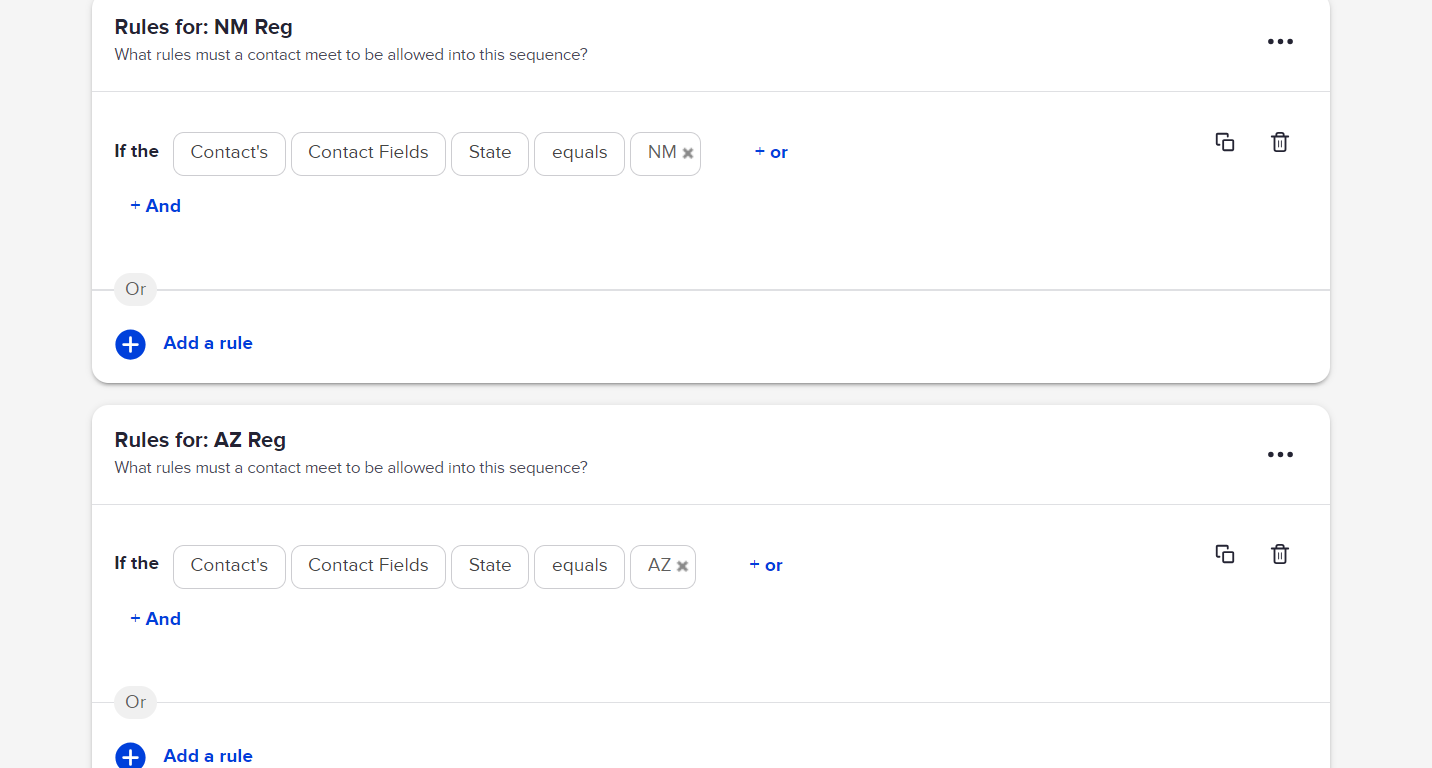
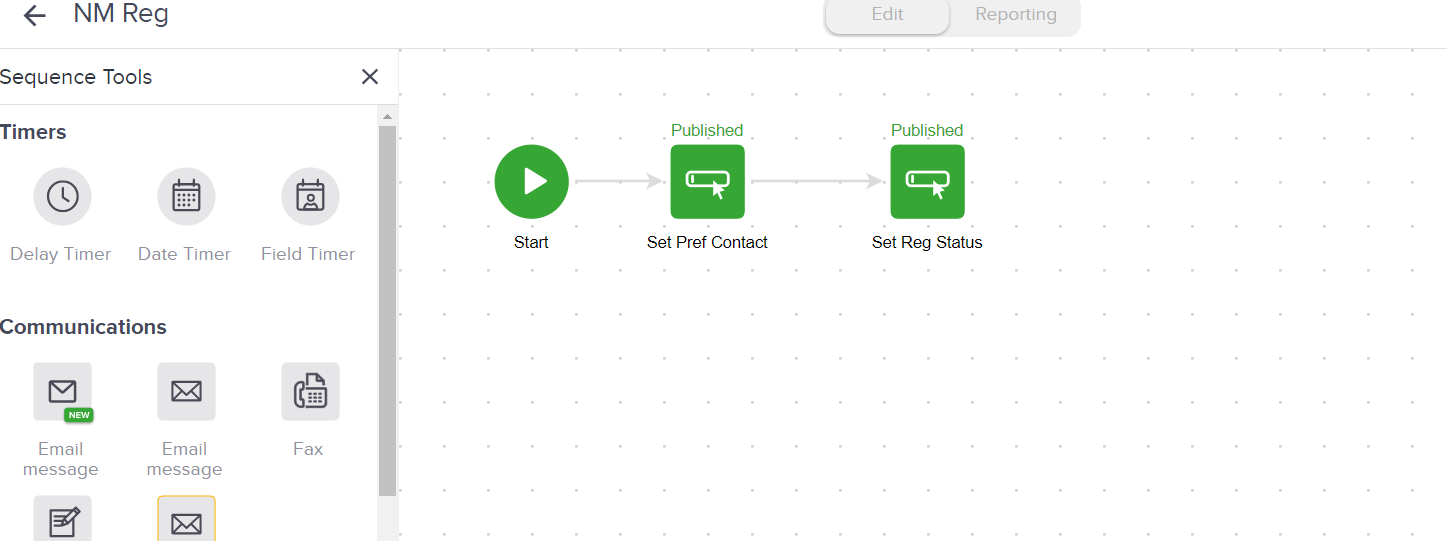
- Inside the sequence add a set field value to set the value of Preferred Contact and overwrite the value of Reg Status.
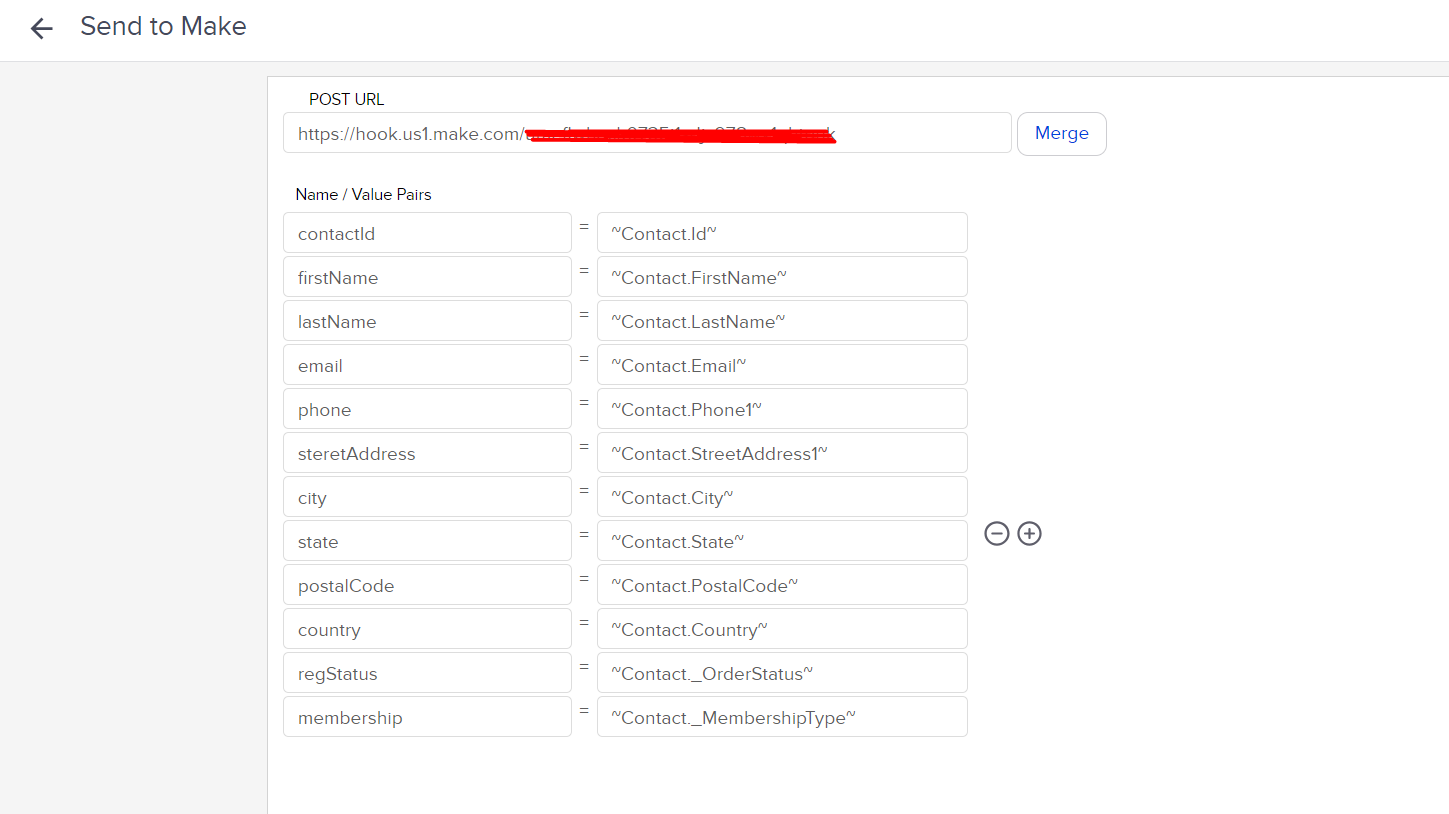
- After completing the previous step, proceed by adding another sequence that will send contact details to a webhook URL using the “Send HTTP Post” action.
- View of Campaign.
2. Airtable Setup:
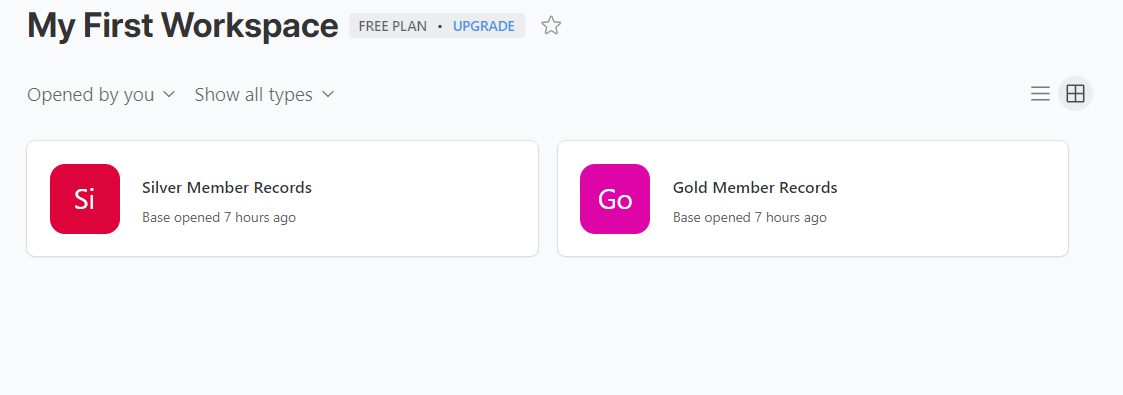
- Login to Airtable account and create a workspace.
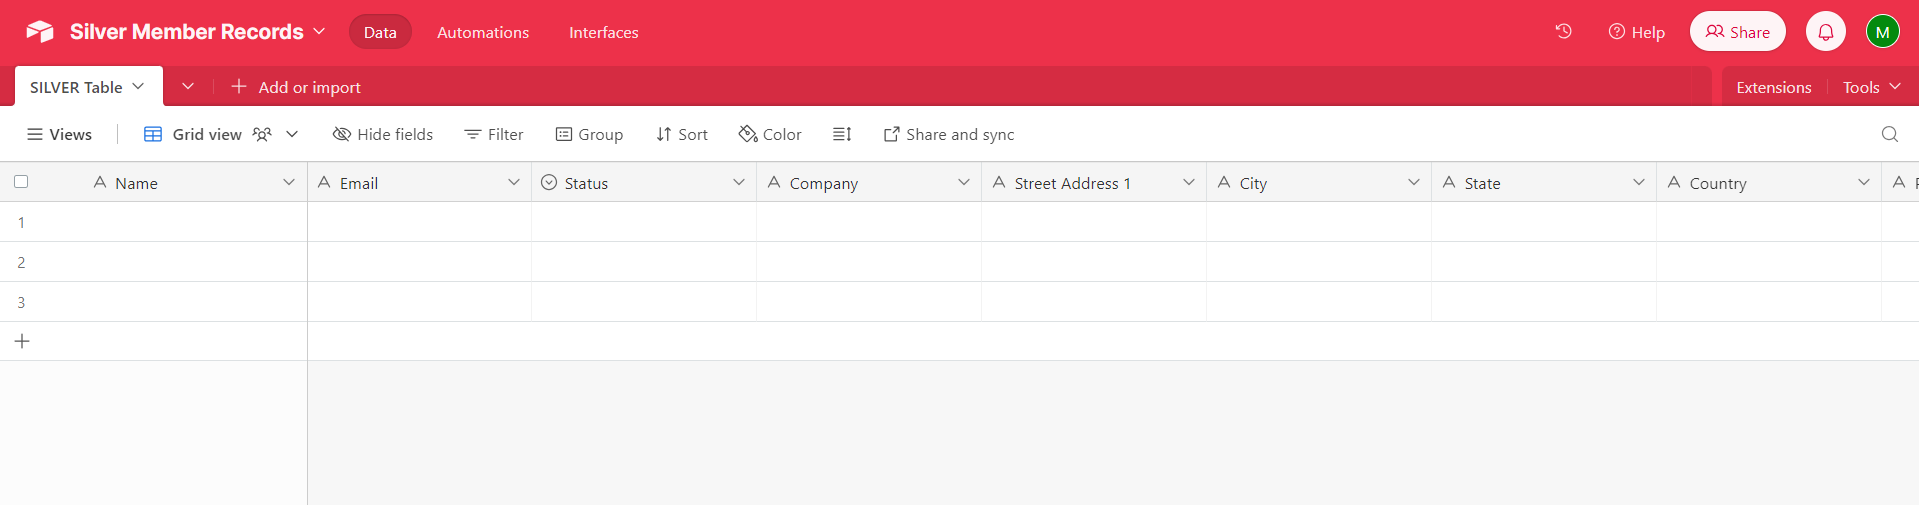
- Create 2 tables in Airtable named: Silver member records and Gold member records.
- Set all fields in Tables named: name, email, status, street address,city etc.

3. Make Setup:
- Login to make.com and create a scenario.
- Add a custom webhook as a trigger.
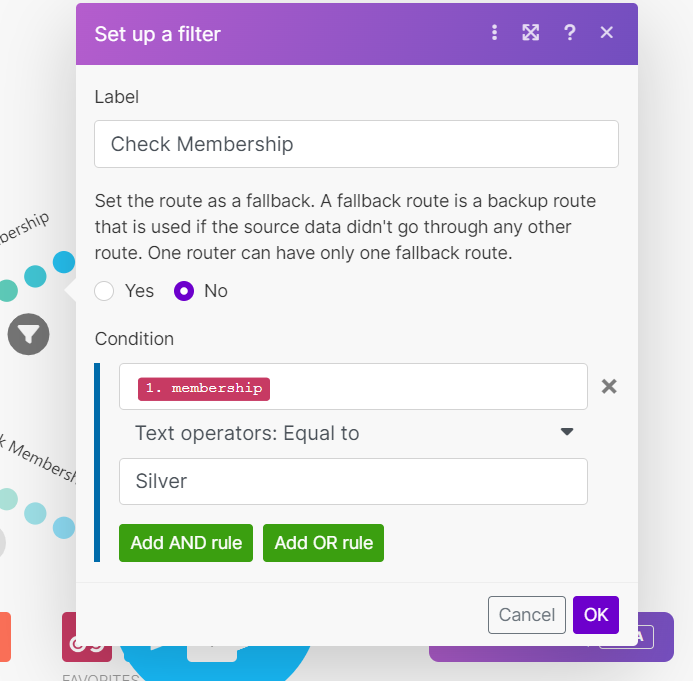
- Add a router with a filter condition to check the membership value. This router directs incoming data to their respective routes based on the specified conditions.
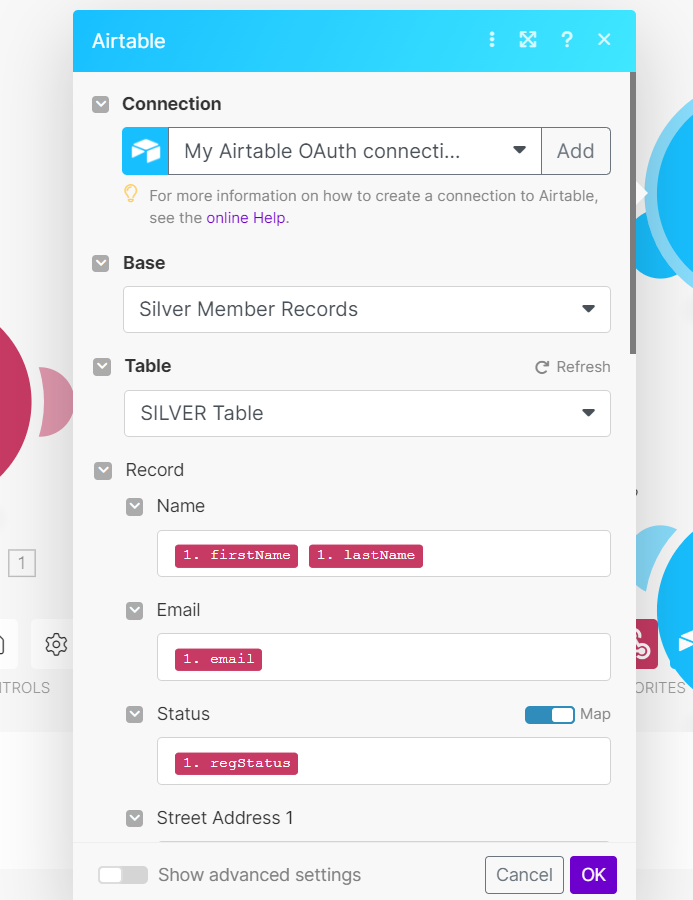
- Add air table based on filter condition routes, one route for Silver Table and another route for Gold Table. Mapped all values with Airtable fields.
4. Results:
Keap View Before the Campaign Runs

Keap View After the Campaign Runs
- Tag Applied

- Campaign Record

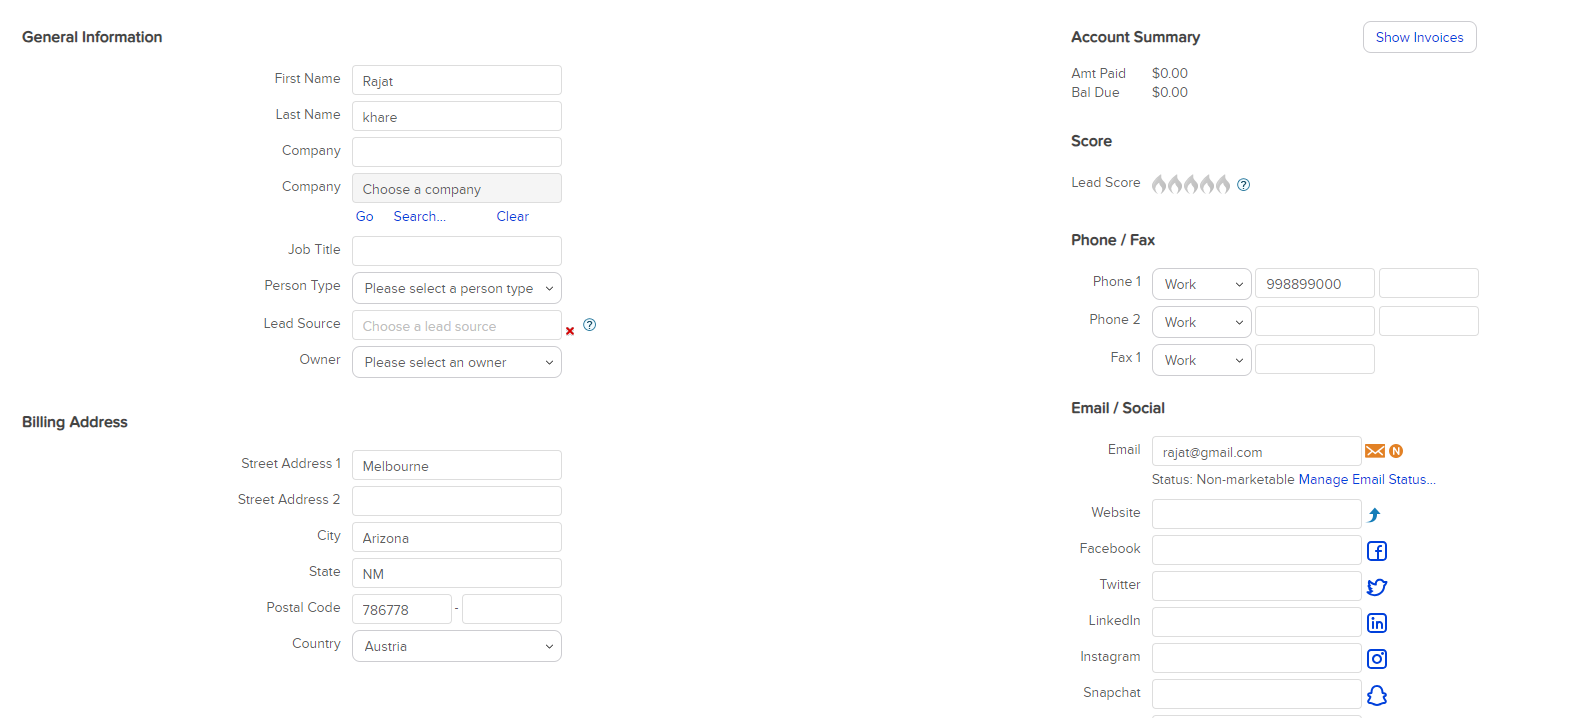
- Updated Contact: Status changed from Pending to Confirmed.

Make Scenario
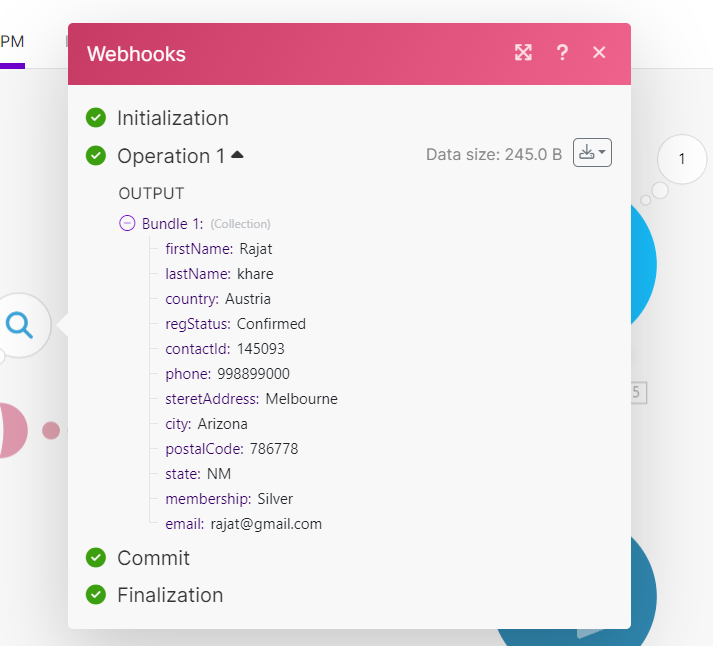
- Webhook Response
- Airtable Response
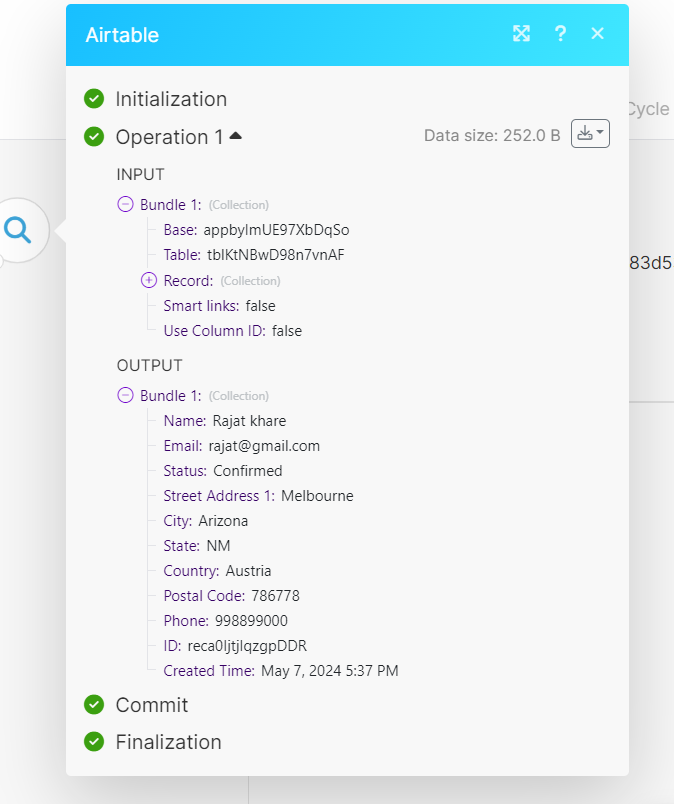
Airtable Result
- Silver Table Record

- Gold Table Record

Conclusion:
In conclusion, this streamlined workflow harnesses the power of automation to seamlessly connect Keap, Make.com, and Airtable, ensuring efficient data management and precise categorization. By leveraging specific tags in Keap to initiate actions and carefully assessing conditions, the process optimizes the flow of information, ultimately directing relevant data to its designated destination tables in Airtable. HikeBranding developers use this comprehensive approach which not only enhances operational efficiency but also facilitates informed decision-making, ultimately contributing to enhanced productivity and effectiveness in managing contacts and campaign strategies.