Introduction:
Elevate the design of your blog posts with Elementor by creating a custom loop grid. The default loop style may not be suitable for everyone’s blog design. This is where custom loop grid can help you stand out from the crowd. Our talented designers at HikeBranding has got your back covered.
Dive into the world of design customization without the hassle of coding. If we use this powerful feature of Elementor, then there is no need of additional plugins or addons. We can use loop grid widget for enhanced design flexibility.
Requirement – Loop grid is only available in the updated Elementor, so make sure it’s installed & activated.
To do this, follow the steps:
First, you have to create a custom blog post loop template using Elementor. For instance, we will be creating this custom blog post layout design.

Create a Custom Blog Post Loop Template
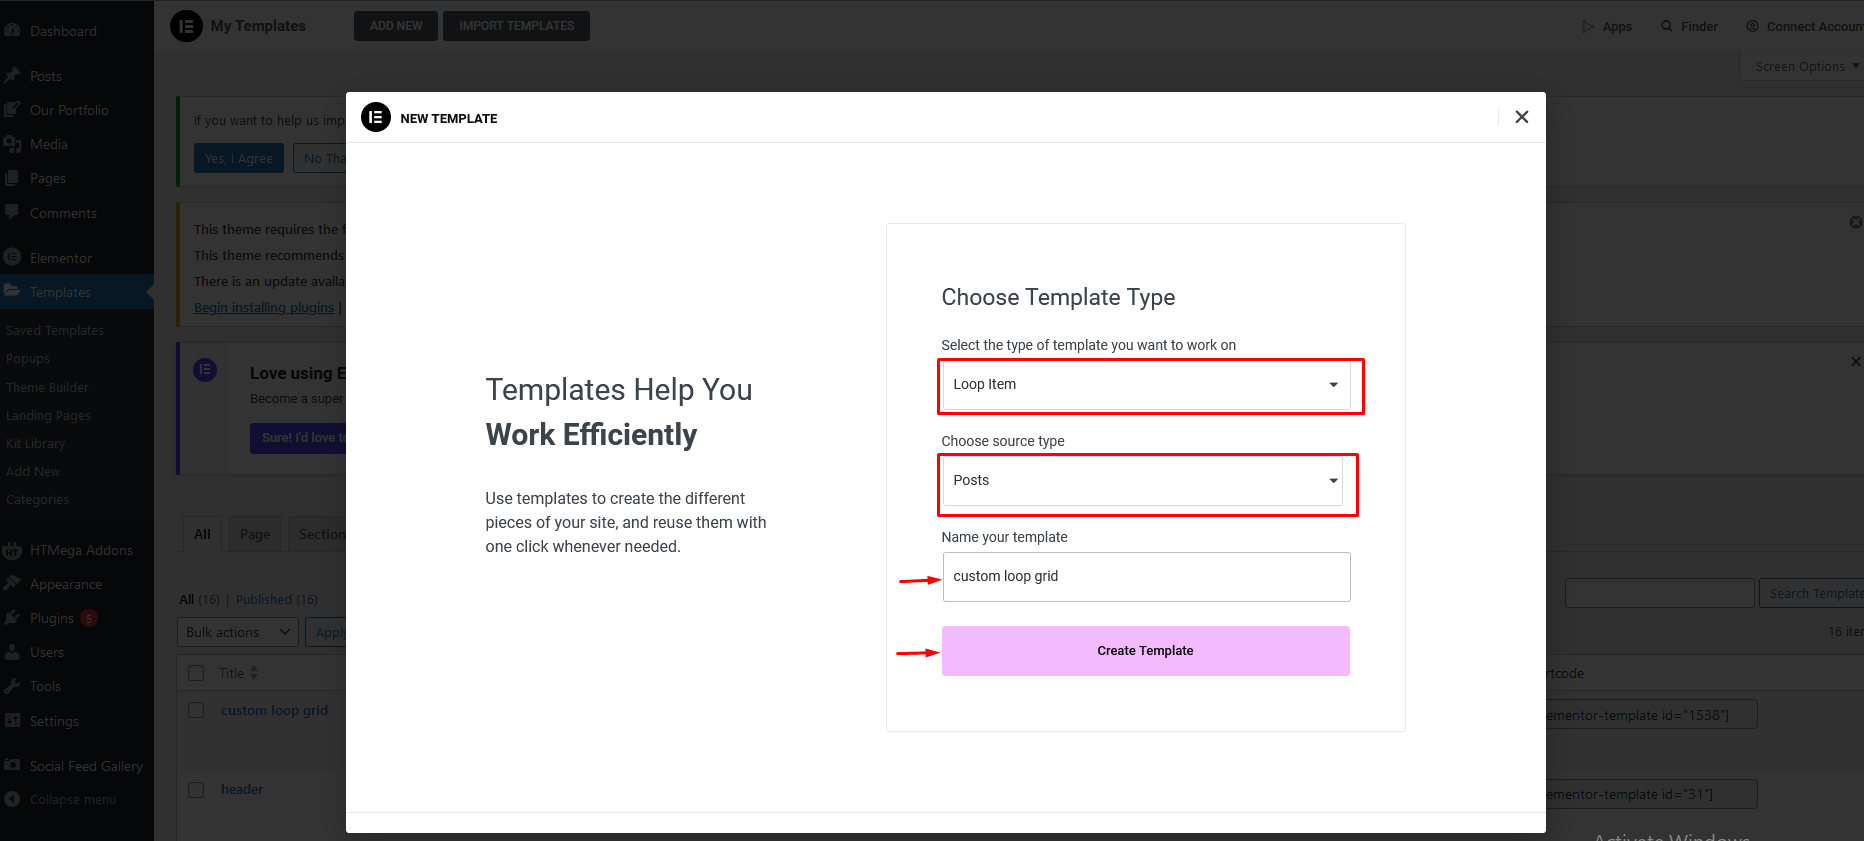
1. To do this from the Dashboard, go to Templates and click on Add New, then select the type of template you want to work on ->Loop Item, choose source type ->Posts, name your template ->Custom Loop Grid, then click on the Create Template button.
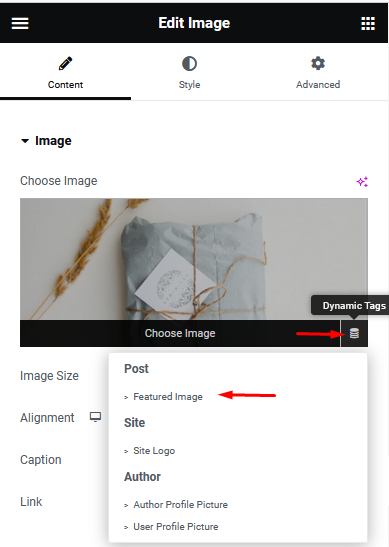
- 2. Add a container then to add the post image, we’ll use the Elementor Image widget, in the Choose Image field, click on the Dynamic Tags and select Featured Image under Post.
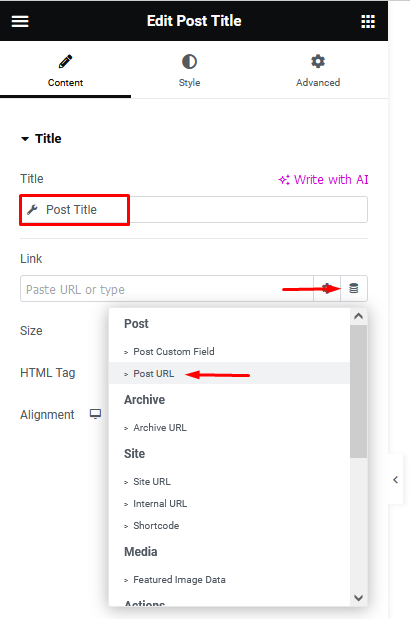
3. For the post title, we’ll use the Elementor Heading widget and to make it dynamic, click on the Dynamic Tags in the Title field and select Post Title under Post.
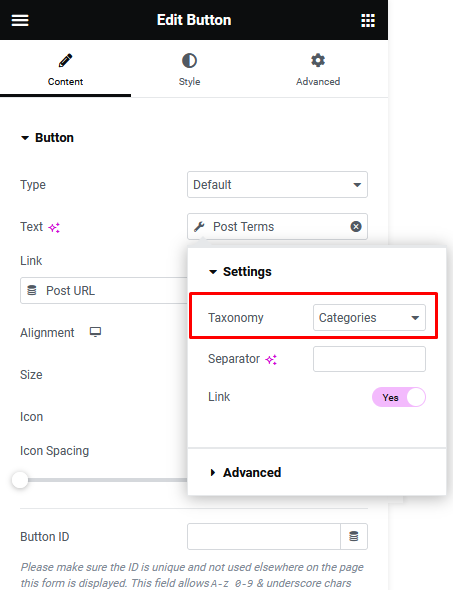
4. To show the category we’ll use the Elementor Icon List widget, click on the Dynamic Tags and select Post Term under Post. Then click on the Wrench icon and choose Category from the Taxonomy drop-down.
5. Now, to add the post content we’ll use the Elementor Text Editor widget and to make it dynamic, click on the Dynamic Tags field and select Post Excerpt under Post.
6. Once done, publish the template.
Now Next Use Above Template with Loop Grid Widget
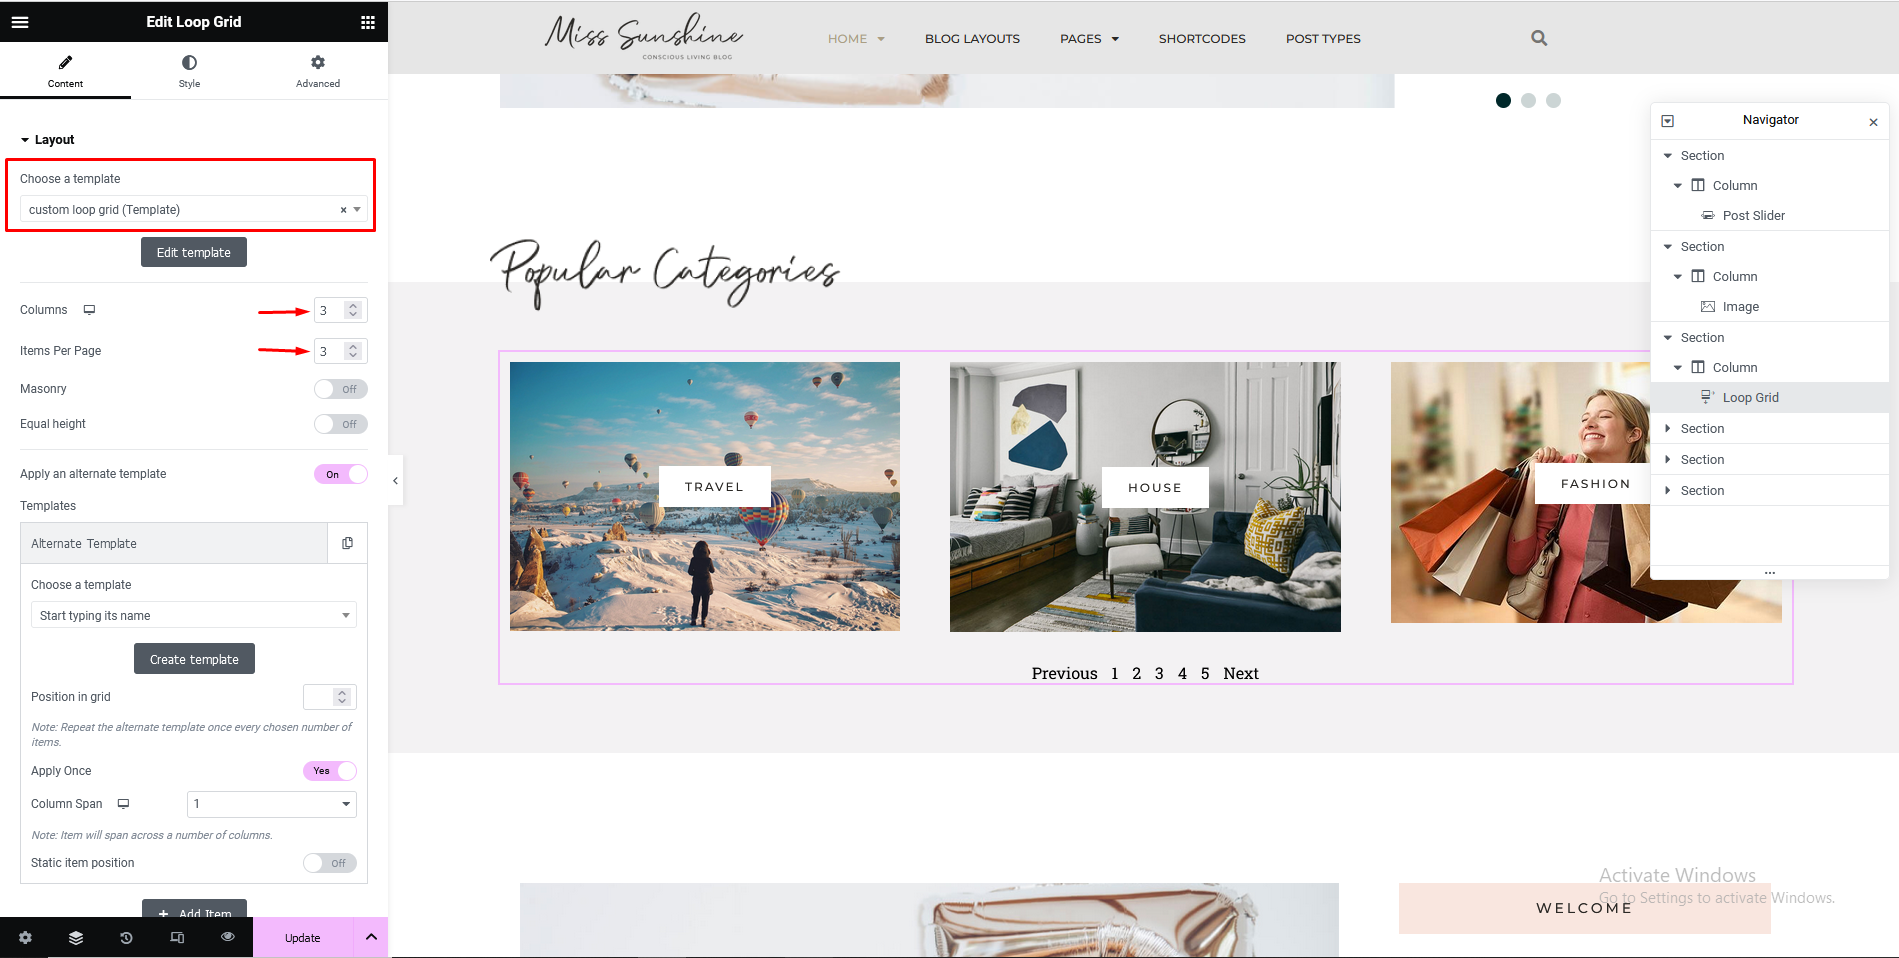
Once you have created your custom blog post loop layout, you can use it anywhere with the Loop Grid widget. Take a Loop Grid widget on a page or template and follow the below steps:
1) Layout:
- Now, you have to choose above template from the Choose a template drop-down.
- You can select below options as per your need for post grid
-
-
- a. Columns
-
- b. Items Per Page
-
- c. Masonry layout
-
- c. Equal height
-
2) Query:
- In a Loop Grid, queries are used to select exactly what content you want to display in your loop. This, in addition to all the design options, makes the loop grid an extraordinarily flexible tool.
3) Pagination:
- Choose pagination type based on your requirement: Numbers, Numbers + Previous/Next, Load on Click, Infinite Scroll.
Now, your blog post will show in your custom layout.
Conclusion:
Creating a custom loop grid for blog posts using Elementor can significantly enhance the design and functionality of your website as explained by our HikeBranding designers above. By utilizing Elementor’s powerful features and customization options, you can create a unique and visually appealing layout that showcases your blog posts in an engaging way. Whether you’re looking to highlight specific categories, add custom filters, or simply improve the overall aesthetics of your blog page, Elementor provides the tools you need to create a professional and dynamic blog grid.